Category: Uncategorized
-
-
Bogner Alchemist flaw?
Posted at 11:47 pm , on October 24, 2014
Hello all!
I’m back again with perhaps an interesting little discovery.
A client recently emailed me that he’d only be in town for a couple days, and his amp had gone dead. No lights, nothing. He sent me a link to a forum post showing the same symptoms he was experiencing, and asked if it was something I could fix. I said if the internet was correct then sure, no problem. This is of course heavily dependent on the internet being correct, and the local electric suppliers having the equipment I needed.
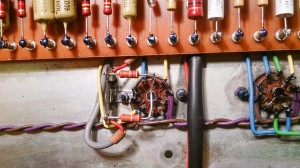
The issue at hand, was the tubes would no longer light up, and neither did the panel lights. The internet forum pointed to the rectifier bridge that fed the heaters and other low voltage circuits. Here is that rectifier:

It had de-soldered itself, and it cooked the hot glue they had installed on the wire next to it. Reading it’s label, it was a basic 8amp 600v rectifier. Big girl to be sure but nothing that special. They’re very popular on amps due to price and amp load capacity (Ampacity?). Anyhoo…it was now that I realized that this circuit was fused at 8amps, meaning that unless the designer felt he wanted things fused very far beyond the requirements, the rectifier was running at it’s limit for at least part of it’s life. The internet appeared to be on to something.
After hunting around Miami, the best I could come up with was a 1000v 8a square rectifier. Not the 12amp I wanted, but I only had 2 days to fix it, so I couldn’t feasibly overnight anything. Besides 8a was the factory rating so it should work fine. I mounted it up, making sure that nothing untoward was touching, and powered it up.

It worked! Sounded pretty good too. The effects, though digital, were very nice especially the controllable repeats on the delay. After a few minutes though I decided to see how hot the rectifier was getting. It was idling at 120C! (248F). The spec for the part says that it’ll run until 150C, but that’s too close for my comfort. A larger rectifier might help, but there were none to be found that would fit into the board without heavy modification. This is when I went back to my computer overclocking days, heatsinks! I’ve got stacks of the things! I took a hacksaw and cut a square from a video card heatsink, thermal greased and glued it into place. The idle temperature dropped to 99-100C(210-212F) Not ice cold but now well below the spec limit.

I know I know, it’s a kludge. Not even a pretty one to tell you the truth. It does however bring the temperature to a workable range that should keep the amp ruining for a good while longer than the original part.
The amp was reassembled and delivered to a very happy client who was flying out the next morning! Normally I prefer to have more time, but when you don’t have the luxury of time you just gotta make things work! I hope you’ve enjoyed reading about this mod/repair, and if you need something taken care of please drop me a line at rauldelp@ra2amps.com.
-
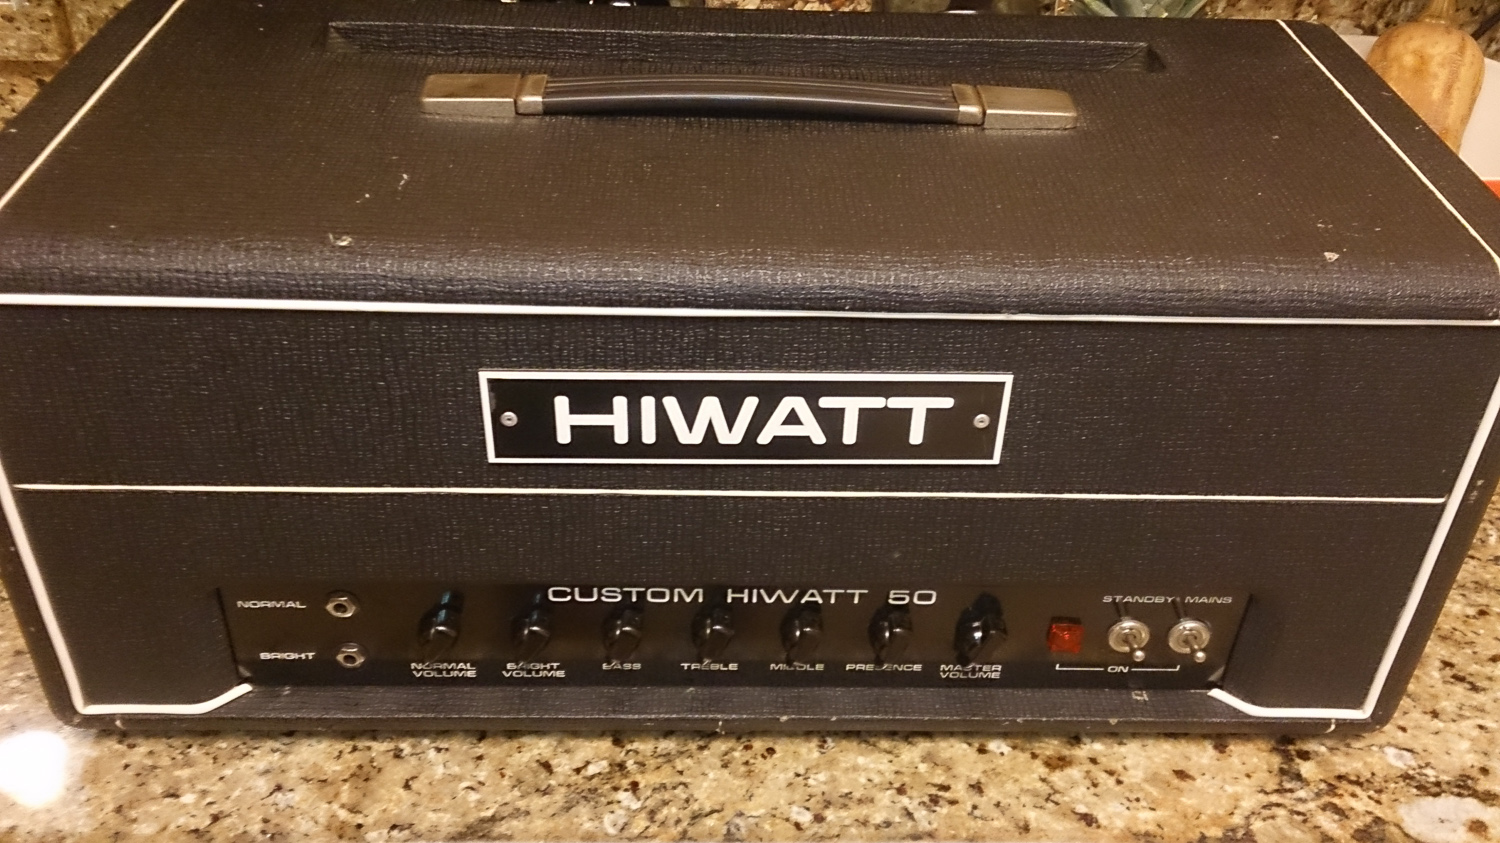
Hiwatt Custom 50 modifications
Posted at 4:04 pm , on May 18, 2014
This week my friend Dorian decided that he wanted to get his Hiwatt DR504 (Wired by the legendary Harry Joyce!! I’m a wiring nerd…) looked at to take care of a few small issues. Luckily this was an old school build with lots of room to work. What a difference compared to that Mesa!
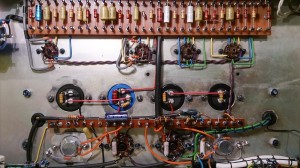
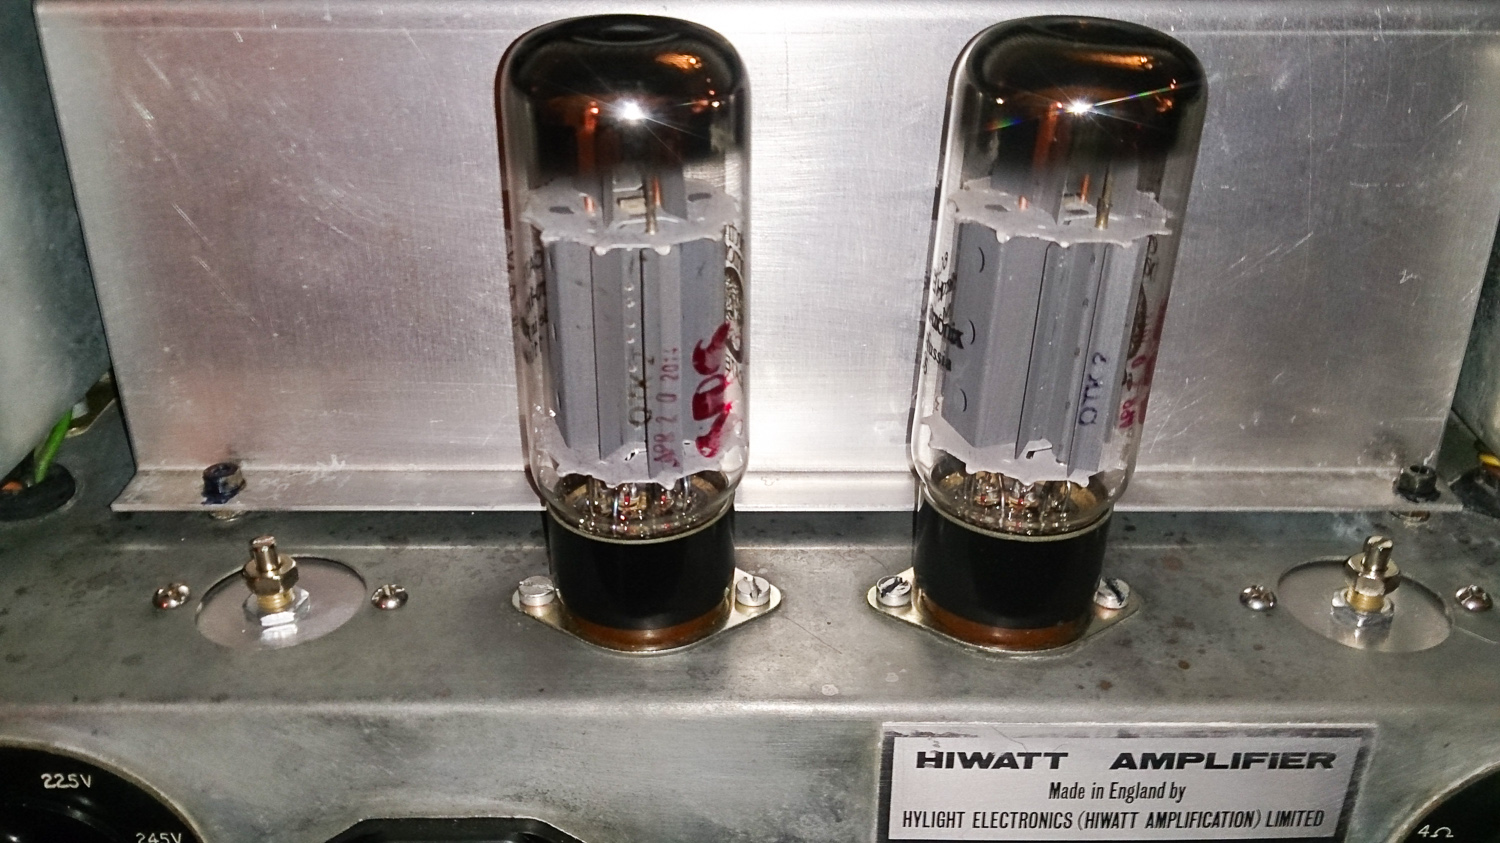
The first problem he needed taken care of was he wanted a bias adjustment pot installed. As designed these amps didn’t have an adjustment, but they were designed 30+ years ago when you could get very good tubes from anywhere and the wall voltage was 110VAC-117VAC standard. In this modern era of 124VAC (my walls) and Russian and Chinese tubes, you would generally be idling the tubes way, way too hot. Installed in the amp were a pair of Electro Harmonix 6CA7’s (Russian, New production) that ended up idling at 56ma even while at the correct 115VAC power. Solution? Re-build the bias circuit to allow more negative voltage, and use the empty octal socket holes to mount the bias pots! I could have done just one pot, but Dorian wanted to be able to perfectly match his tubes on the amp, and we also had two empty holes, so why not! The controls are mounted in those holes so nothing was cut on the amp. He can return to stock within an hour and look perfect.

Now he can adjust his tubes from 3ma-106ma current draw. So, very very cold, to very very hot! Not for the timid, but modern tubes draw current all over the place so this large a range will allow him to use and match any tube he comes across. Maybe he’ll try an EL34, 6L6GC combo? Currently this set is idling at 38.5ma each (approx: 70% dissipation with 455v on the plates)
The next issue to remedy was blocking distortion when you max out the normal channel volume on the amp. To remedy this, I used the Mark Huss 4-input mixer mod (http://hiwatt.org/2_mod.html) which replicates the input circuit of the 4 input amplifier on the 2 channel one. Worked out beautifully, the amp now gets to the edge of the ugly distortion when everything is set to maximum. I tested it with an EMG equipped Stratocaster, a very hot signal, and it sounded pretty awesome. It should be just fine with everything else.
 The last couple things was replacing the post phase inverter capacitors with new just as a maintenance item at his request, as well as replacing the screen resistors with new ones as well to replace the mis-matched pair currently installed in the amp. They weren’t broken yet, but, it takes little time to remedy potential issues while I’m already inside the amp.
It was a joy working on this amp, and it’s got all that raw British-ness, and immediacy that Hiwatts are known for. Truly a special piece of gear, that should serve it’s owner for many years to come.
If you’ve got an amplifier that you need tweaked, modified, repaired, or rebuilt, drop me a line at RauldelP@ra2amps.com. We’ll discuss what you need/want done, and what it’ll take to get it there. I work mainly on tube equipment, but I’ll happily work on solid state as well. Guitar, bass, keyboard, accordion, PA, I’ll work on them all!
-Raul
-
Ra2 Amplification, coming online
Posted at 5:50 pm , on April 10, 2014
The site, and new home, of Ra^2 Amplification Company is coming online. I’ll be posting new products, plans, and repair work that I do.
We are a tiny company consisting of my wife and myself, but I promise we’ll be producing some of the sweetest tone boxes you’ve ever laid eyes on. All custom built, sparing no expense on components and construction techniques. Built one at a time on my little desk, tweaked until I am satisfied with how it sounds. Yes, it takes longer, but the end result is an extension of your guitar. Something that will dance and groove along with you. This is how you’re supposed to sound.
Sound clips, images, specs, projects, all coming soon.
Thank you very much,
-Raul
-